Hand Stitching - Tumblr Posts


Ive been really unmotivated recently so I decided to sit down and force myself to create with some scraps I had around and I subconsciously made a slugcat
I did not mean to make a slugcat


More photos, carry on.


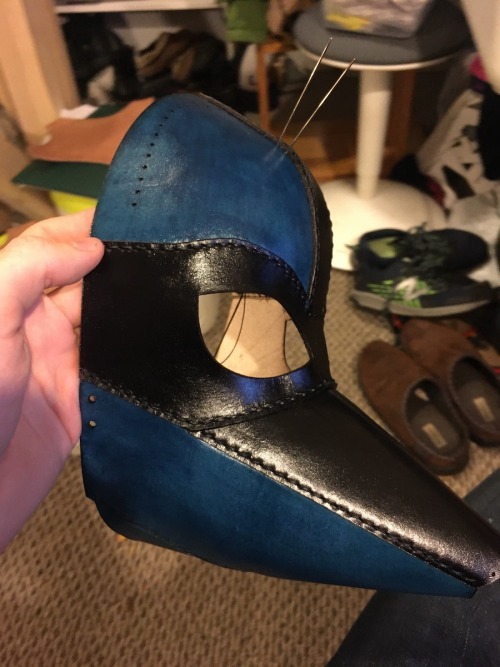
Made a black version of my steampunk-ish respirator mask (previously seen here), also wanted to show it with the option for attaching with just a simple cord to knot instead of the full buckle arrangement. 4 oz vegetable-tanned leather, laser-cut, dyed and sewn together by hand, with brass screen beneath the grating. Not protective on its own, but you can wear it over a disposable or cloth mask. Available on my Etsy shop!


Progress shots of making a Lucario costume, my most recent big project. First up, the mask!
As per usual, I designed it in 3D in Rhino, laid out all the pieces, and cut it with my laser cutter. I decided to stitch this mask together, so I included all the holes for the thread when laser cutting it.
Next was to dye it, and start on the process of sewing it all together by hand. At each step I soak the new pieces in water to make them flexible, and sculpt it to shape as I’m doing the stitching. When the leather dries, it stiffens up again. Last step is putting a finish coat on it--here I used a glossy clear coat. The ears had to wait until the main mask had gotten the finish coat.
Preliminary photos of the outfit here.


Lucario pup mask! Look at those little teeth!
I made the original last Halloween, expecting it to stay a personal project, so I was surprised and excited to get a request to make a copy. This one was updated with my standard 5-point strap arrangement (for the original I tried out a 3-point setup that turned out to be not very secure), black inner ears, and a mouth with cute little teeth!
The client is putting together a sweet Lucario outfit, you should check him out: https://twitter.com/niko_piros/status/1429169615502991366 (that post is suggestive, elsewhere on his profile has some fully 18+ content). He’s also previously put together probably my favorite pup play outfit out there, a very good Bowser themed set of gear.
Haha,

more!

More!
Slap stack.


Codpieces! I shipped these two out last week.


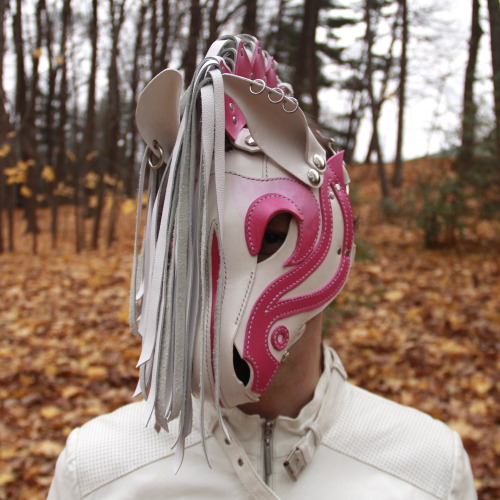
This carousel horse has a bit of an attitude.
This was a commission for a friend. The base pattern for the mask is from Dieselpunk.Ro. I made some small tweaks on the mask itself, but the big change was designing the big floppy mane. I love how it hangs over the face like some sort of pastel pink scene kid. The sawtooth part of the mane is a reference to the haircuts that Norwegian Fjord Horses often get. The construction of the mane was a riff on how @ramshacklegear did the mane on his chess piece pony hood, so check that out here and here.
This pony also has a spicy side, second post incoming.
Photos by Adelair.


Updated design for my lined collar! I think I'm finally getting the specs on this dialed in properly.
I'm putting it up on my Etsy for continuing sale! It'll be made-to-order generally, unless you happen to be the same size as this one was made to, in which case I can ship it immediately.


I love making these punk styled slap bracelets.
To be honest, they're way nicer than this sort of joke object has a right to be--in order to get the action to work right, I need to hand-stitch the suede liner onto the top layer, with a slight length difference to force the curvature.
Previously seen on video here
Coming to a theater near you here
wip

shes always asking am i alright
(the weird little stick thing is meant to be a tongue)
Hey you! Yeah you! Have you ever been living life when you think to yourself, man I wish I could do that. Think to yourself,
Yeah I can do that! Who's gonna stop me!
Please ignore the previous statement if thought involved illegal activities.
Well I hand made a plushie and I'm proud of myself.
When Jaiden Animations uploaded her video reviewing gen 5 pokemon plushies, I wondered what Drifloons official plush looked like. Looking it up, it was kinda disappointing. There were parts I thought I'd change if I made it myself...

Then I thought, why don't I make it myself! So I stopped studying for my exam and proceeded to plan out the designs. However, I'm no expert by any means. My credentials were essentially:
Learned how to sew a quilt in grade 11.
Quick fixes in clothes or toys.
Lots of videos of doll customizations and a few cosplay tutorials I've seen on YouTube.
So, I set my expectations low and kept my self-confidence high. My margin of error for the drifloon plush was going to be huge, so regardless of the end result, I'll be happy.


Above are some of the first drafts of templates I used. The seem-lines excess grew as I learned that more is better. The circular tag for the bottom of Drifloon I had to remake a few times, so it was big enough with the final product. The arms I originally thought to make with fabrics, but once realizing it would look like shoelaces, I challenged myself to use rope.
I also had no plan for the cloud. I did know I wanted to use fabric rather than it to be pure fluff like the official design. I ended up just stuffing and stretching fabric into a sphere shape and sewing it together, hiding all the raw edges.
When I went to buy the material, I didn't buy plush and soft materials. If I remade the plush, I probably would make the cloud part fluffy, but since drifloon is a balloon, the smooth pillow-like sheets (Linen, I think) worked fine.


Gotta love the stitch work of my first attempt. I probably used a total of four stitch methods. One was stitched the machine, then handstitched the rest since I realized it was crazy to machine stitch something so small. Two of the stitches I probably made up. I stuffed the pads, and the end result is smooth enough, and I love each little flaw. The mistakes also helped me understand how to approach the rest of the body.
One, two, skip a few, I stitched 5 oval patterns together to make the body. I then bought an embroidery hoop to make the eyes. I thought of doing an outline for the mouth but settled for machine stitching.


This poor baby wasn't properly stuffed. Originally, I planned on using old stuffing, but then I bought cotton to stuff it properly. I accidentally ripped the material and thought I fixed it, but after stuffing it I realized he had a Dwane Johnson eyebrow. Luckily, with new stuffing, it's less noticeable, kind of.


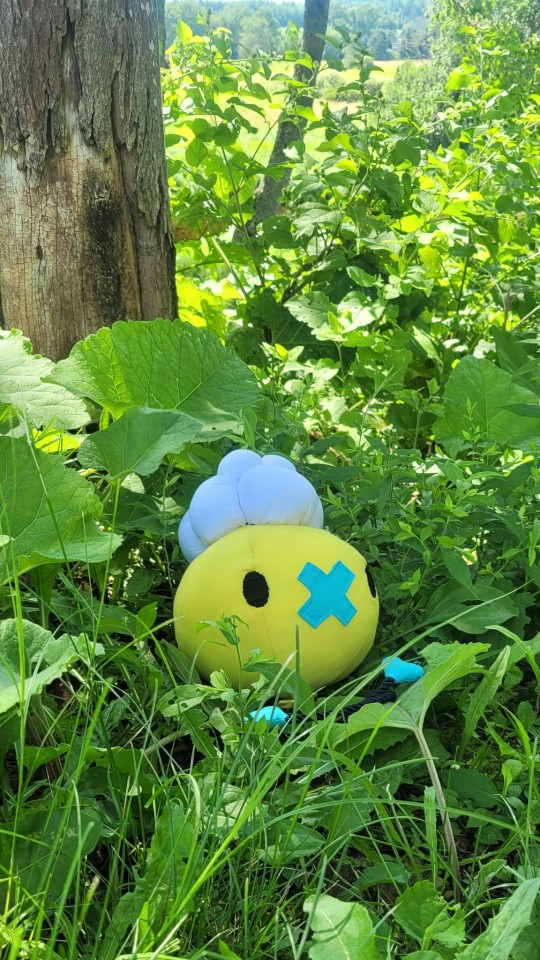
Above is the finished product immediately after I finished! Ignore the calendar it was actually June. He can sit without rolling and the colours look great together! It wasn't until recently when the weather was beautiful and I took him outside for a photo shoot!
While there was lots of mistakes, I had lots of fun learning. I love my shiny baby who was inspired by a shiny I caught in Pokemon Scarlet, my first non-guaranteed shiny in a main game! Her ingame name is Aurora, but I've been calling the plush a he, so do with that info as you will.

Thank you for reading!
This project was really fun for me, and it all started by just wanting to do it myself. I hope this encourages you to just make something you've been holding out on doing. You may make mistakes like I did, but you may also finish with a final product that YOU made! What's cooler than that?
I made a little guy!!!


I love Aurora so much! My shiny drifloon plush I made by hand!
I made an in-depth post of my progress making her by hand from her ingame counterpart!

Link below:


Embroidery piece of Johannes Vermeer's painting "Girl with a Pearl Earring"
Swipe for the original photo

Cactus embroidery
If you like it Follow me for more 🧡🧡🧡


I need more books 📚 🧡


Working on a design for an old jacket I got
Wander hat

Wander hat on the cat

